Emergency Solutions That Actually Work 🖊️💥
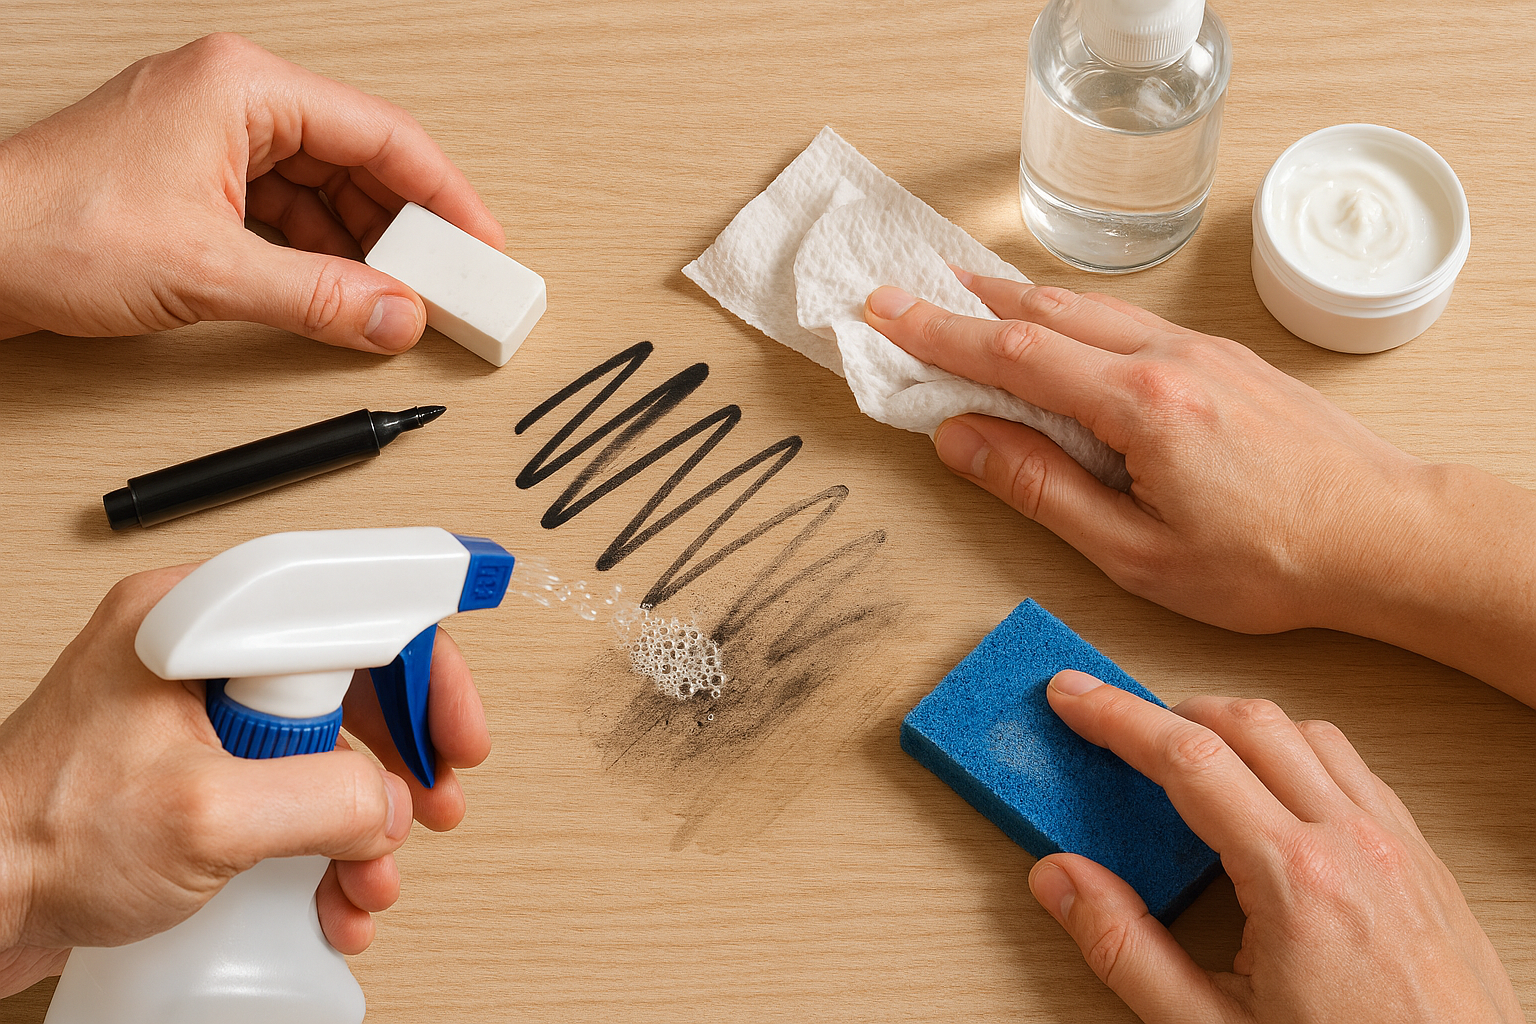
PANIC MODE ACTIVATED! 🚨 Your toddler just transformed your white wall into their personal art gallery using a black Sharpie. Your teenager accidentally used a permanent marker on your expensive quartz countertop. You grabbed the wrong marker during that important meeting and now there’s permanent ink all over the whiteboard. Sound familiar?
Here’s the truth: how to remove permanent marker from any surface isn’t just possible – it’s actually easier than you think when you know the right techniques! Despite what the name suggests, “permanent” markers aren’t always permanent, and with over 380,000 people searching for these solutions monthly, you’re definitely not alone in this crisis.
The secret lies in understanding the science behind permanent marker chemistry and using the right household items that are probably sitting in your kitchen or bathroom cabinet right now. From walls and clothing to wooden furniture and granite countertops, every surface has a specific removal method that works like magic when applied correctly.
Time is everything when it comes to permanent marker removal. The longer that ink sits on any surface, the deeper it penetrates and the harder it becomes to remove. But don’t worry – even set-in stains that have been there for weeks or months can often be rescued with the right approach.
The Science Behind Permanent Marker Chemistry (And Why It Matters) 🧪
Understanding why permanent markers stick so stubbornly helps you remove them more effectively. Permanent marker ink consists of three main components: a colorant (pigment or dye), a solvent (usually alcohol-based), and a resin (the sticky polymer that binds everything together).
Here’s what happens when you write with a permanent marker: The alcohol-based solvent evaporates almost immediately after application, leaving behind the colorant and resin bonded to the surface. This rapid evaporation is why permanent markers dry so quickly and why water won’t remove them – the ink components left behind are specifically designed to resist water.
The key to removal lies in breaking down these bonds. Alcohol-based solvents can re-dissolve the dried resin, making the colorant mobile again so it can be wiped away. This is why rubbing alcohol, hand sanitizer, and hairspray (which contains alcohol) are so effective at removing permanent marker stains.
Different surfaces react differently to permanent marker ink. Non-porous surfaces like glass, metal, and whiteboards allow for easier removal because the ink sits on top rather than soaking in. Porous surfaces like wood, fabric, and unfinished materials absorb the ink deeper, making removal more challenging but not impossible.
Just like understanding how technology works behind the scenes helps us use devices more effectively, knowing the chemistry of permanent markers helps us choose the most effective removal methods for each situation.
Emergency First Aid: What to Do in the First 5 Minutes ⏰
The first five minutes after a permanent marker accident can determine whether you face an easy cleanup or a major restoration project. Here’s your immediate action plan:
Step 1: DON’T PANIC! Take a deep breath. Almost all permanent marker stains can be removed with the right approach, even if they seem impossible at first glance.
Step 2: STOP THE SPREAD 🛑 If the marker is still leaking or the stain is wet, immediately blot (don’t rub!) with a clean paper towel or cloth to absorb excess ink. Rubbing will only spread the stain and push it deeper into the surface.
Step 3: IDENTIFY YOUR SURFACE 🔍 Quick identification helps you choose the most effective removal method:
- Non-porous (easy removal): Glass, metal, whiteboards, sealed countertops
- Semi-porous (moderate difficulty): Painted walls, finished wood, laminate
- Porous (challenging): Unfinished wood, fabric, carpet, unsealed stone
Step 4: GATHER YOUR WEAPONS 🧴 Head to your bathroom or kitchen and grab these miracle workers:
- Rubbing alcohol (70% isopropyl alcohol)
- Hand sanitizer (alcohol-based)
- White toothpaste (not gel)
- Baking soda
- Clean cotton balls or cloth
Step 5: TEST FIRST, SAVE LATER ✅ Always test your chosen removal method on an inconspicuous area first. This 30-second test can save you from turning a small marker stain into major surface damage.
Fabric and Clothing: Rescuing Your Wardrobe 👕
Permanent marker on clothing feels like a death sentence, but it’s often completely reversible. The key is understanding your fabric type and acting quickly with the right treatment.
Cotton and Synthetic Fabrics: The Easy Winners
Rubbing alcohol is your superhero for most clothing fabrics. Cotton, polyester, and poly-blend fabrics respond excellently to alcohol-based treatments:
The Professional Method:
- Place paper towels or an old cloth underneath the stained area
- Saturate a cotton ball with 70% rubbing alcohol
- Dab (never rub!) the stain from the outside edges toward the center
- Replace the cotton ball frequently as it absorbs ink
- Continue until no more ink transfers to the cotton ball
- Rinse thoroughly with cold water
- Apply liquid laundry detergent directly to the area
- Wash in the hottest water safe for the fabric
Hand Sanitizer Alternative: If you don’t have rubbing alcohol, alcohol-based hand sanitizer works similarly. Apply generously, let sit for 2-3 minutes, then blot with clean cloths.
Hairspray Method: Alcohol-based hairspray can work wonders, especially on synthetic fabrics. Spray directly onto the stain, let sit for one minute, then blot with clean paper towels.
Delicate Fabrics: Silk, Wool, and Leather
Delicate fabrics require gentle treatment to avoid damage while still removing the stain effectively.
For Silk and Wool:
- Skip the alcohol completely – it can damage these natural fibers
- Mix equal parts baking soda and non-gel white toothpaste
- Gently massage the mixture into the stain with your fingertip
- Let sit for 5 minutes, then rinse with cool water
- Hand wash with gentle detergent
For Leather Items:
- Distilled white vinegar is your safest bet
- Apply small amounts to a cotton ball and dab the stain
- Let the vinegar sit for 2-3 minutes to break down the ink
- Wipe with a clean, damp cloth using circular motions
- Allow to air dry completely
Much like how proper password management requires different approaches for different security levels, fabric care demands tailored solutions based on material sensitivity.
Walls and Painted Surfaces: Saving Your Walls Without Ruining Paint 🎨
Wall stains are every parent’s nightmare, but most can be removed without damaging paint. The trick is using the gentlest effective method first, then escalating if necessary.
Method 1: The Toothpaste Miracle
White toothpaste (not gel!) works amazingly well on painted walls because it acts as a mild abrasive that lifts ink without damaging paint:
- Apply a small amount of white toothpaste directly to the stain
- Use a damp cloth to gently rub in circular motions
- Wipe clean with a fresh damp cloth
- Repeat if necessary
Why it works: Toothpaste contains mild abrasives that physically lift the ink while being gentle enough not to damage paint. The cleaning agents in toothpaste also help break down the marker’s resin component.
Method 2: Lemon Essential Oil Magic
Lemon essential oil is perfect for painted walls because it combines natural acidity with oil-based solvents:
- Put a few drops of lemon essential oil on a clean cloth
- Gently rub the stained area in circular motions
- The acidic lemon breaks down ink while oil acts as a solvent
- Wipe clean with a damp cloth
Bonus: Your room will smell amazing afterward!
Method 3: Magic Eraser (Use with Caution)
Magic Erasers can work miracles but can also remove paint if used too aggressively:
- Dampen the Magic Eraser slightly
- Gently rub the stain with minimal pressure
- Work in small sections and check progress frequently
- Stop immediately if you notice paint coming off
Pro tip: Magic Erasers are basically super-fine sandpaper, so always use the lightest touch possible.
Hard Surfaces: Glass, Metal, and Countertops 🪟
Non-porous hard surfaces are usually the easiest to clean because the ink sits on top rather than soaking in.
Glass Surfaces: Windows, Mirrors, and Glassware
Glass is probably the easiest surface to clean because permanent marker doesn’t bond strongly to it:
Method 1 – Rubbing Alcohol:
- Apply rubbing alcohol to a paper towel
- Wipe the glass in one direction
- The ink should come off immediately
Method 2 – Nail Polish Remover:
- Use acetone-based nail polish remover for stubborn stains
- Apply with cotton ball and wipe clean
- Rinse thoroughly with water
Method 3 – Dry Erase Marker Trick:
- Draw over the permanent marker with a dry erase marker
- Wipe both away with a dry cloth
- This works because dry erase markers contain solvents that dissolve permanent ink
Metal Surfaces: Appliances and Hardware
Stainless steel appliances and metal surfaces respond excellently to simple treatments:
- Rubbing alcohol: Most effective and won’t damage finishes
- Toothpaste: Works well and adds a shine
- Dry erase marker: Quick and easy for fresh stains
Granite and Stone Countertops
Natural stone requires careful treatment to avoid etching or damage:
Safe Method for Granite:
- Use only rubbing alcohol or hydrogen peroxide
- Apply with a soft cloth and dab gently
- Never use vinegar – it’s too acidic and will etch granite
- Wipe clean immediately and polish with a microfiber cloth
For Quartz Countertops:
- Quartz is more durable than granite
- Rubbing alcohol works best
- Magic Erasers can be used with very light pressure
- Commercial cleaners like Amodex are safe and effective
Just as choosing the right cloud storage solution requires understanding different technologies, selecting the right cleaning method requires understanding surface materials.
Wood Surfaces: Furniture, Floors, and Cabinets 🪵
Wood surfaces present unique challenges because the treatment method depends entirely on whether the wood is finished (sealed with varnish, paint, or stain) or unfinished (raw wood).
Finished Wood: Safe and Effective Removal
Most wooden furniture and floors have protective finishes that make marker removal much easier:
Toothpaste and Baking Soda Method:
- Mix equal parts white toothpaste and baking soda
- Apply to a damp cotton cloth
- Rub gently with the wood grain (never against it)
- Wipe clean with a damp cloth
- Dry thoroughly and apply furniture polish if desired
Rubbing Alcohol Method:
- Dampen a cotton cloth with rubbing alcohol
- Dab lightly to moisten the stained area
- Wipe away residue with a damp cloth
- Work in the direction of the wood grain
Peanut Butter Surprise:
- Yes, you read that right! The oils in peanut butter help dissolve ink
- Apply a small amount and let sit for 5 minutes
- Wipe away with a damp cloth
- This method is surprisingly effective and completely safe for finishes
Unfinished Wood: Handle with Care
Raw, unsealed wood is much more challenging because the ink penetrates deeply into the wood fibers:
- Consider consulting a professional for valuable pieces
- Sand very lightly with fine-grit sandpaper if other methods fail
- Apply wood stain to blend the treated area
- Seal with appropriate wood finish to prevent future stains
Plastic Surfaces: Toys, Containers, and Furniture 🧸
Plastic surfaces are generally forgiving and respond well to multiple removal methods. The type of plastic and its texture affect which method works best.
Smooth Plastic: Quick and Easy Solutions
Hand sanitizer is often the most effective method for smooth plastics:
- Apply a small amount of alcohol-based hand sanitizer
- Rub with a paper towel in circular motions
- The alcohol dissolves the ink while the gel consistency helps lift it away
- Wipe clean with a damp cloth
Dry Erase Marker Trick:
- Draw over the permanent marker with a dry erase marker
- Wipe both away with a dry cloth
- This method works particularly well on smooth, non-porous plastics
Vegetable Oil Method:
- Apply a small amount of cooking oil to the stain
- Let sit for 2-3 minutes to soften the ink
- Rub with a cloth in circular motions
- Clean with soap and water to remove oil residue
Textured Plastic: Extra Effort Required
Textured plastics hold ink in their grooves, requiring more aggressive but careful treatment:
- Use an old toothbrush with your chosen solvent
- Work gently to avoid scratching the surface
- Pencil erasers can work on some textured plastics
- Commercial products like Goo Gone are often necessary for stubborn stains
Carpet and Upholstery: Deep Cleaning Solutions 🛋️
Permanent marker on carpet or upholstery requires immediate action to prevent the ink from setting permanently into the fibers.
Carpet Treatment: Professional-Grade Results
Rubbing Alcohol Method (Most Effective):
- Place clean paper towels under the carpet if possible
- Saturate a cotton cloth with rubbing alcohol
- Dab the stain gently – never rub or scrub
- Replace the cloth frequently as it absorbs ink
- Continue until no more ink transfers to the cloth
- Rinse with clean water using a spray bottle
- Blot dry with clean towels
Nail Polish Remover for Stubborn Stains:
- Use acetone-based nail polish remover as a last resort
- Test in an inconspicuous area first
- Apply sparingly with cotton balls
- Rinse thoroughly to prevent damage to carpet fibers
Upholstery: Fabric-Specific Approaches
Microfiber Upholstery:
- Rubbing alcohol and a damp sponge work best
- After cleaning, brush the area to restore fiber texture
- Hydrogen peroxide can work but test first
Leather Upholstery:
- Use only distilled white vinegar
- Apply with cotton balls and blot gently
- WD-40 can work but may leave oily residue
- Consider professional cleaning for expensive pieces
Similar to how smart home systems require different approaches for different devices, upholstery cleaning demands customized solutions based on material type.
Whiteboard Disasters: When You Grab the Wrong Marker 📝
Using permanent marker on a whiteboard is one of the most common marker accidents, but it’s also one of the easiest to fix!
The Dry Erase Marker Miracle
This trick seems too simple to work, but it’s nearly magical:
- Get a dark-colored dry erase marker
- Trace directly over all the permanent marker marks
- Make sure you cover every bit of permanent ink
- Wipe everything away with a whiteboard eraser or cloth
- The permanent marker will come off with the dry erase marker
Why this works: Dry erase markers contain solvents that dissolve permanent marker ink. When you trace over permanent ink with dry erase marker, you’re essentially re-wetting the permanent ink and making it removable.
Alternative Whiteboard Methods
Rubbing Alcohol Method:
- Spray 70% isopropyl alcohol on the board
- Wipe with a microfiber cloth
- Works especially well for older stains
Toothpaste Method:
- Apply white toothpaste to the stain
- Scrub gently with a damp cloth
- Rinse with water and dry thoroughly
Baking Soda Paste:
- Mix baking soda with just enough water to make a paste
- Apply to the stain and scrub gently
- Rinse and dry completely
Skin Safety: Removing Marker from Yourself 👐
Getting permanent marker on your skin happens to everyone, and while it’s not dangerous, you probably want it gone quickly for professional or social reasons.
Gentle Skin-Safe Methods
Makeup Remover Wipes (Best Option):
- Specifically designed for skin use
- Gentle but effective at breaking down inks
- Rub in circular motions until ink lifts
- No irritation for most skin types
Baby Oil or Olive Oil:
- Completely safe for all skin types
- Apply generously and massage in
- Let sit for 2-3 minutes
- Wipe away with a clean cloth
- Wash with soap and water
Hand Sanitizer:
- Use alcohol-based hand sanitizer
- Apply and massage gently
- Less irritating than straight rubbing alcohol
- Rinse with water when done
Natural Methods:
- Sea salt mixed with lemon juice creates a gentle scrub
- Whitening toothpaste can work for stubborn stains
- Baby wipes are gentle enough for sensitive skin
What to AVOID on skin:
- Nail polish remover (too harsh and potentially toxic)
- WD-40 (not meant for skin contact)
- Bleach products (dangerous and unnecessary)
- Abrasive scrubbing (can damage skin)
Advanced Techniques: When Basic Methods Fail 🔥
Sometimes standard methods aren’t enough, especially for old stains or challenging surfaces. Here are professional-grade techniques that can save seemingly hopeless situations.
Heat Application Method
Heat can reactivate dried permanent marker ink, making it easier to remove:
Hair Dryer Technique:
- Use a hair dryer to warm the stained area (don’t overheat!)
- Apply your chosen solvent while the surface is still warm
- The heat helps the solvent penetrate and dissolve the ink more effectively
- Work quickly before the surface cools
This method works particularly well on:
- Plastic surfaces with old, set-in stains
- Metal surfaces where ink has bonded strongly
- Laminate surfaces that resist other treatments
Commercial Product Solutions
When household items aren’t cutting it, these commercial products can tackle the toughest stains:
Amodex Ink and Stain Remover:
- The only product officially recommended by Sharpie
- Safe for use on clothing, carpets, and most surfaces
- Can sit on stains for hours without damage
- Specifically designed for permanent marker removal
Goo Gone:
- Excellent for adhesive and marker residue
- Safe for most surfaces when used properly
- Citrus-based formula is relatively gentle
- Great for plastic and metal surfaces
WD-40:
- Contains solvents that dissolve ink effectively
- Works well on metal and some plastic surfaces
- Never use on fabric or near skin
- Requires thorough cleaning afterward to remove oily residue
Multi-Stage Treatment Process
For the most stubborn stains, use a systematic approach:
Stage 1: Try the gentlest method first (toothpaste, hand sanitizer) Stage 2: Escalate to alcohol-based solvents Stage 3: Use commercial products if needed Stage 4: Consider professional restoration for valuable items
Between each stage, rinse thoroughly and allow the surface to dry before trying the next method. Mixing different chemicals can be dangerous and often reduces effectiveness.
Just like troubleshooting network problems requires systematic approaches, permanent marker removal benefits from methodical progression through increasingly powerful solutions.
Surface-Specific Expert Tips and Tricks 🎯
Electronics and Screens: Delicate Operations
Electronic screens require extreme care to avoid damage while removing marker stains:
Safe Method for Screens:
- Never use alcohol or acetone – they can damage screen coatings
- Start with baby wipes or damp microfiber cloth
- If that doesn’t work, apply a tiny amount of white toothpaste
- Let sit for 2-3 minutes, then wipe with barely-damp cloth
- Dry immediately with clean microfiber cloth
For Plastic Electronic Cases:
- Hand sanitizer usually works well
- Test in an inconspicuous area first
- Avoid getting liquid into ports or openings
Ceramic and Tile: Textured Challenges
Smooth ceramic tiles clean easily, but textured surfaces require special attention:
Smooth Ceramic:
- Rubbing alcohol, toothpaste, or Magic Eraser all work well
- Nail polish remover for tough stains
- Hairspray for quick removal
Textured Ceramic:
- Use an old toothbrush with your chosen solvent
- Work the bristles into grooves and texture
- Cotton swabs for detailed work in small crevices
- Be patient – textured surfaces take longer
Vehicle Surfaces: Cars and Outdoor Equipment
Automotive surfaces require careful treatment to avoid damaging paint or finishes:
Car Paint:
- Start with rubbing alcohol on a soft cloth
- Commercial automotive cleaners if alcohol doesn’t work
- Never use acetone or nail polish remover on car paint
- Consider professional detailing for valuable vehicles
Vinyl and Rubber:
- Hand sanitizer works excellently
- Vegetable oil for stubborn stains
- Goo Gone for commercial-grade removal
Preventing Future Permanent Marker Disasters 🛡️
Prevention is always better than removal, especially when dealing with valuable or delicate surfaces.
Storage and Handling Tips
Proper marker storage prevents accidents:
- Store permanent markers vertically with caps facing up
- Keep markers away from children and accident-prone areas
- Use marker caddies or containers to prevent rolling
- Check caps regularly to ensure they’re tight
Workspace Protection:
- Use protective mats or papers when working with permanent markers
- Keep tissues or paper towels handy for immediate cleanup
- Have rubbing alcohol within reach when using markers regularly
Smart Alternatives and Substitutions
Consider these alternatives for situations where permanent markers might cause problems:
- Washable markers for children’s activities
- Dry erase markers for temporary labeling
- Removable labels instead of direct marking
- Painter’s tape for temporary identification
Surface Protection Strategies
Protect vulnerable surfaces before problems occur:
- Apply protective films to frequently-marked surfaces
- Use removable protective coatings on wooden surfaces
- Consider laminating important papers before marking
- Train family members on proper marker selection
Similar to how proper device maintenance prevents major problems, good marker hygiene prevents most staining incidents.
Emergency Situations: When Time is Critical ⚡
Some permanent marker situations require immediate action to prevent permanent damage or costly consequences.
Rental Property Emergencies
Permanent marker damage in rental properties can cost you your security deposit – but quick action can save the day:
Immediate Response Plan:
- Document the damage with photos
- Begin treatment within 30 minutes if possible
- Start with the gentlest method appropriate for the surface
- Don’t stop until the stain is completely gone
- Take after photos to document successful removal
Landlord Communication:
- Inform your landlord immediately if damage occurs
- Show before and after photos of your cleaning efforts
- Offer to pay for professional cleaning if your efforts aren’t sufficient
- Most landlords appreciate tenants who take responsibility
Workplace Incidents
Permanent marker accidents at work can be embarrassing but are usually fixable:
Office Whiteboards:
- Use the dry erase marker trick immediately
- Keep rubbing alcohol wipes in your desk for emergencies
- Most office cleaning supplies include appropriate solvents
Company Property:
- Report accidents to facilities management immediately
- Offer to handle cleanup yourself if appropriate
- Many offices have commercial cleaning products available
School and Educational Settings
Teachers and students face marker mix-ups regularly:
Classroom Whiteboards:
- The dry erase marker method works 99% of the time
- Keep dedicated cleaning supplies in classroom
- Train students on proper marker selection
Student Accidents:
- Most schools have commercial cleaners available
- Document successful removal methods for future reference
- Educate about prevention to reduce repeat incidents
Professional-Grade Solutions and When to Call Experts 🔧
Sometimes DIY methods aren’t enough, and knowing when to call professionals can save time, money, and valuable items.
When to Go Professional
Consider professional help for:
- Antique or valuable furniture with permanent marker damage
- Large-scale damage (entire walls, expensive carpets)
- Delicate fabrics like silk, cashmere, or designer clothing
- Historic or irreplaceable items
- Situations where DIY attempts have made the problem worse
Professional Services Available
Restoration Specialists:
- Furniture restoration for wooden pieces
- Textile conservation for valuable fabrics
- Art restoration for damaged artwork or books
Commercial Cleaning Services:
- Carpet and upholstery specialists
- Commercial building maintenance
- Specialized surface restoration
Costs vs. Benefits:
- Professional cleaning typically costs $100-$500
- Compare to replacement costs of damaged items
- Many professional services guarantee results
Just as knowing when to upgrade technology versus repair it saves money, understanding when to seek professional help prevents costly mistakes.
Innovative and Unusual Methods That Actually Work 🤯
Beyond traditional cleaning methods, some surprising household items can remove permanent marker stains effectively.
Kitchen Cabinet Solutions
Sunscreen: Many sunscreens contain oils that help break down ink. Apply, rub gently, and wipe away.
Cooking Spray: The oils in cooking spray can dissolve marker ink on hard surfaces. Spray lightly and wipe with paper towels.
Milk: Believe it or not, milk can work on some fabric stains. Soak the stained area and wash normally.
Coffee: Fresh black coffee can sometimes lift marker stains from light-colored fabrics (counterintuitive but occasionally effective).
Bathroom Cabinet Surprises
Deodorant/Antiperspirant: Spray-on deodorants can work on metal and glass surfaces due to their alcohol content.
Shaving Cream: The surfactants in shaving cream can help lift stains from skin and some fabrics.
Moisturizer: Heavy moisturizers can work like oils to break down ink on skin.
Garage and Workshop Solutions
Brake Fluid: Extremely effective but very harsh – use only on metal or concrete surfaces and ensure proper ventilation.
Insect Repellent: DEET-based repellents can dissolve marker ink but should be used carefully due to chemical strength.
Acetone (Pure): Available at hardware stores, much stronger than nail polish remover. Use with extreme caution and proper ventilation.
Troubleshooting: When Nothing Seems to Work 🔧
Sometimes marker stains seem absolutely permanent, but there are still options before giving up completely.
Stain Assessment and Strategy
Analyze your situation:
- How long has the stain been there?
- What surface are you dealing with?
- What methods have you already tried?
- How valuable is the stained item?
Progressive Treatment Approach:
- Rehydration: Try reactivating old stains with gentle heat and fresh solvent
- Combination Methods: Mix baking soda with alcohol or vinegar for enhanced cleaning power
- Extended Contact Time: Let solvents sit longer on stubborn stains
- Repeated Applications: Sometimes it takes multiple treatments over several days
Creative Solutions for Hopeless Cases
When all else fails, get creative:
Camouflage Techniques:
- Use darker permanent markers to create intentional designs
- Turn accidental marks into decorative patterns
- Create “distressed” or “antiqued” finishes
- Use fabric paint to incorporate marks into designs
Professional Refinishing:
- Strip and refinish wooden surfaces
- Reupholster furniture if fabric can’t be saved
- Repaint walls if marker removal damages paint
- Replace only the affected section if possible
The same problem-solving mindset that helps with computer troubleshooting applies to stubborn stain removal – sometimes creative solutions work better than conventional approaches.
Safety Considerations and Health Precautions ⚠️
Marker removal often involves chemical solvents, so safety should always be your top priority.
Ventilation Requirements
Always ensure adequate ventilation when using solvent-based removers:
- Open windows and doors
- Use fans to circulate air
- Avoid enclosed spaces
- Take breaks if you feel dizzy or nauseous
Chemical Safety Guidelines
Read labels and follow safety instructions:
- Never mix different chemical products
- Use gloves when handling harsh solvents
- Keep chemicals away from children and pets
- Store products in original containers with labels
First Aid Knowledge:
- Know what to do if chemicals contact skin or eyes
- Keep emergency contact numbers handy
- Have a well-stocked first aid kit available
- Know when to seek medical attention
Environmental Considerations
Dispose of cleaning materials responsibly:
- Don’t pour solvents down drains
- Follow local hazardous waste disposal guidelines
- Use minimal amounts to reduce environmental impact
- Choose eco-friendly alternatives when possible
Cost-Effective Solutions: Maximum Results, Minimum Expense 💰
Professional marker removal doesn’t require expensive products. Most effective solutions cost less than $10 and use items you probably already have.
Budget-Friendly Arsenal
Essential items under $20 total:
- Rubbing alcohol (70% isopropyl): $2-$3
- White toothpaste: $1-$2
- Baking soda: $1
- Cotton balls and cloths: $3-$5
- Hand sanitizer: $2-$3
These five items can handle 95% of permanent marker situations you’ll ever encounter.
Cost Comparison: DIY vs. Professional
DIY marker removal:
- Materials cost: $5-$15
- Time investment: 15 minutes to 2 hours
- Success rate: 85-95% for most situations
Professional cleaning:
- Service cost: $100-$500
- Convenience factor: High
- Success rate: 95-99%
- Best for valuable or irreplaceable items
Replacement costs:
- Clothing: $20-$200+
- Furniture: $200-$2,000+
- Countertops: $1,000-$5,000+
- Flooring: $2,000-$10,000+
The math clearly favors attempting DIY removal first, similar to how smart financial planning emphasizes cost-effective solutions.
Real-World Success Stories and Case Studies 📖
Learning from others’ experiences helps build confidence in tackling your own marker emergencies.
The Whiteboard Salvation
Teacher’s Nightmare Turned Triumph: A middle school teacher accidentally used a permanent marker to write an entire lesson on her whiteboard. Using the dry erase marker method, she completely removed two full boards of permanent writing in less than 10 minutes. Her principal was amazed when she demonstrated the technique during the next faculty meeting.
The Granite Countertop Rescue
Kitchen Catastrophe: A homeowner’s teenager used a permanent marker to label food containers directly on a $3,000 granite countertop. Multiple black marks seemed to spell disaster for the expensive surface. Using only rubbing alcohol and patience, every mark was removed without damage to the granite. Total cost of repair: $3 for the alcohol.
The Carpet Miracle
Living Room Emergency: A toddler found a red permanent marker and decorated an entire section of white living room carpet. The parents were prepared to replace the carpet until they tried the rubbing alcohol method. After three treatment sessions over two days, the carpet looked brand new. Professional carpet cleaning would have cost $300+.
The Leather Furniture Win
Designer Disaster: Permanent marker accidentally marked a $2,000 leather sofa during a family game night. Using only distilled white vinegar and gentle dabbing, the marks disappeared completely. The homeowner saved thousands in reupholstery costs.
These success stories prove that with the right knowledge and persistence, even seemingly impossible permanent marker situations can be resolved successfully.
Future-Proofing: Advanced Prevention Strategies 🚀
Smart prevention goes beyond just storing markers properly – it involves creating systems that minimize marker accidents and maximize quick response when they do occur.
Home Organization Systems
Create marker-safe zones:
- Designate specific areas for marker use
- Install protective surfaces in craft areas
- Keep cleaning supplies nearby where markers are used
- Train all family members on proper marker handling
Emergency Response Kits:
- Keep marker removal supplies in multiple locations
- Create quick-reference cards with removal instructions
- Stock emergency cleaning supplies in cars
- Maintain supplies in workplace desks
Technology Integration
Modern solutions for marker management:
- Use smartphone apps to quickly look up removal methods
- Keep digital photos of successful removal techniques
- Set phone reminders for marker cap checks
- Use voice assistants to quickly access removal instructions
Teaching and Education
Share knowledge to prevent problems:
- Teach children proper marker selection and use
- Create visual guides for different marker types
- Practice removal techniques before emergencies occur
- Share successful methods with friends and family
The same systematic approach that makes AI tools more effective applies to permanent marker management – preparation and education prevent most problems.
Conclusion: Mastering the Art of Permanent Marker Removal 🎭
The truth about permanent marker removal is simpler than most people think: with the right knowledge, household items, and techniques, you can remove permanent marker from virtually any surface without expensive products or professional services.
Here’s what you need to remember: Speed matters, but it’s not everything. Even old, set-in stains can often be removed with patience and the right approach. The key is understanding the science behind the stains and matching your removal method to both the surface and the situation.
Your emergency toolkit is probably already in your home. Rubbing alcohol, white toothpaste, baking soda, hand sanitizer, and a few cotton balls can handle 95% of permanent marker emergencies. The total cost is under $15, but the potential savings run into thousands of dollars when you consider replacement costs for damaged items.
Don’t let permanent marker accidents ruin your day or your belongings. Whether it’s your child’s artistic expression on the walls, an office whiteboard mishap, or an unfortunate clothing incident, you now have the knowledge and confidence to handle any permanent marker emergency.
Start with gentle methods and escalate gradually. Test first, act quickly, and be patient with the process. Most importantly, don’t panic – permanent markers aren’t nearly as permanent as their name suggests when you know what you’re doing.
Remember the golden rule of stain removal: the sooner you act, the better your chances of complete success. But even if you discover a weeks-old permanent marker stain, don’t give up before trying these proven methods.
Just as learning any new technology becomes easier with practice and understanding, permanent marker removal becomes second nature once you understand the principles and practice the techniques.
Your permanent marker accidents are now temporary problems with permanent solutions. Armed with this knowledge, you can face any marker emergency with confidence, knowing that you have the tools and techniques to restore your surfaces to their original condition.
The next time someone in your family grabs a permanent marker instead of a washable one, you’ll be ready. When you accidentally use a Sharpie on a whiteboard, you’ll know exactly what to do. And when permanent marker finds its way onto your clothes, furniture, or walls, you’ll have multiple proven methods to make it disappear.
Permanent marker removal mastery is now yours – use it wisely, share it generously, and never panic about permanent marker accidents again! 🎉