7 Silent Solutions That Actually Work 🔧
You know that sound. It’s 2 AM, you’re tiptoeing to the kitchen for a midnight snack, and CREAK! Your hardwood floor betrays you with a squeak so loud it could wake the entire house. Now everyone knows about your secret ice cream raids! 😅
If you’re tired of playing hopscotch around squeaky spots in your beautiful hardwood floors, you’re not alone. Over 65% of homeowners with hardwood floors experience squeaking at some point, according to the National Wood Flooring Association. But here’s the good news: how to fix squeaky hardwood floors doesn’t require calling expensive contractors or tearing up your entire floor.
Whether your floors squeak in one annoying spot or sound like a haunted house every time someone walks through the room, these seven professional-grade solutions will restore peace and quiet to your home. From simple 5-minute fixes using household items to permanent solutions that’ll silence squeaks for decades, we’ve got you covered!
Why Your Hardwood Floors Are Screaming for Help (The Real Causes) 🎯
Before we dive into the fixes, let’s understand why your floors are making noise in the first place. Squeaky hardwood floors aren’t just annoying – they’re trying to tell you something important about what’s happening beneath your feet.
Seasonal Movement: Mother Nature’s Mischief
Wood is a living material that constantly expands and contracts with temperature and humidity changes. During winter, your heated home combined with dry air causes wood floors to contract, creating gaps between floorboards and the subfloor. This gives the boards room to move and rub against nails or each other, creating those telltale squeaks.
The sweet spot for hardwood floors is maintaining indoor humidity between 40-60%. When humidity drops below 35% or rises above 55%, you’re practically inviting squeaks to join your household symphony.
Just like how proper home setup requires attention to environmental factors, your hardwood floors need consistent conditions to perform their best.
Loose Nails and Fasteners: The Hidden Culprits
Over time, the nails holding your floorboards to the subfloor can work loose due to normal house settling and wood movement. When nails no longer fit tightly, boards can shift and rub against the metal fasteners. That metallic scraping sound? That’s your floorboard grinding against a loose nail shaft.
Modern installation uses both nails and construction adhesive to prevent this problem, but older floors (especially those over 20 years old) often rely solely on nails, making them more prone to squeaking.
Subfloor and Joist Problems: The Foundation Issues
Sometimes the problem runs deeper than surface boards. Uneven subfloors are one of the most common causes of persistent squeaks. When your subfloor isn’t level, it creates spaces between the hardwood flooring and subfloor. Every step causes the floor to flex downward and rub against the underlying structure.
Floor joists can also be the culprit – these horizontal support beams can warp, shrink, or separate from the subfloor over time, creating gaps that allow movement and noise.
Installation Issues: When Good Intentions Go Wrong
Even brand-new floors can squeak if they weren’t installed properly. Insufficient fasteners, wrong nail placement, or skipping construction adhesive during installation can lead to immediate squeaking problems. Poor subfloor preparation or inadequate joist spacing compound these issues.
Similar to how tech troubleshooting requires systematic diagnosis, fixing squeaky floors starts with identifying the root cause.
Solution #1: The Baby Powder Magic Trick (5-Minute Fix) 👶
This sounds too simple to work, but it’s actually one of the most effective quick fixes for minor squeaks. Baby powder (talcum powder) acts as a dry lubricant that reduces friction between rubbing floorboards.
How to Apply the Baby Powder Method:
Step 1: Walk around and identify exactly where the squeaks occur. Mark these spots with painter’s tape or chalk.
Step 2: Generously sprinkle baby powder, baking soda, or talcum powder directly over the squeaky areas, focusing on the seams between floorboards.
Step 3: Use a soft brush or your fingers to work the powder into the cracks between boards. The goal is getting powder deep into the gaps where friction occurs.
Step 4: Cover the powdered area with a cloth or towel and walk back and forth for several minutes to work the lubricant deeper into the wood joints.
Step 5: Vacuum up excess powder to prevent slippery surfaces and staining.
Pro tip: This method works best for board-to-board squeaks caused by surface friction. It’s temporary (lasting several months) but perfect for seasonal squeaks that may resolve themselves.
Why it works: Baby powder creates a lubricating barrier between wood surfaces, eliminating the friction that causes squeaking sounds. The fine powder penetrates deep into wood grain and joint spaces.
Solution #2: Powdered Graphite – The Professional’s Secret Weapon 🔧
Powdered graphite lubricant is the upgraded version of baby powder – more effective, longer-lasting, and specifically designed for this purpose. Professional floor installers swear by this method for quick squeak fixes.
The Graphite Application Process:
Step 1: Purchase powdered graphite lubricant from any hardware store (costs around $5-8).
Step 2: Locate squeaky areas and thoroughly clean between floorboards using compressed air or a vacuum crevice tool.
Step 3: Sprinkle a thin, even layer of powdered graphite along the length of squeaking board joints.
Step 4: Cover with paper towels to keep powder in place while you work it in.
Step 5: Walk back and forth over the area for 3-5 minutes, moving in circles and different directions to distribute the lubricant.
Step 6: Clean up excess powder with a damp cloth to prevent tracking throughout the house.
Warning: Graphite can stain light-colored floors and carpets, so use sparingly and clean thoroughly. Test in an inconspicuous area first.
Duration: This fix typically lasts 6-12 months and works especially well on engineered hardwood and laminate floors with click-lock systems.
Solution #3: The Squeeeeek No More Kit – Innovation Meets Convenience 🛠️
The Squeeeeek No More Kit by O’Berry Enterprises has revolutionized DIY floor repair since its introduction over 30 years ago. This ingenious system uses specially designed screws that secure loose floorboards, then snap off below the surface, leaving an invisible repair.
How the Squeeeeek No More System Works:
The kit includes:
- 50 specially scored breakaway screws
- Tripod alignment fixture for carpet
- Hardwood adapter for exposed floors
- Joist finder screws for locating support beams
- Square head driver bit
Step-by-step process:
Step 1: Use the included joist finder screws to locate floor joists beneath squeaky areas. Joists are typically spaced 16 inches apart.
Step 2: Position the appropriate fixture (tripod for carpet, adapter for hardwood) directly over the joist.
Step 3: Drive the scored screw through the fixture and into the floor. The screw penetrates the flooring, subfloor, and anchors into the joist below.
Step 4: Continue driving until the screw head contacts the fixture, causing the top portion to snap off automatically.
Step 5: The threaded portion remains in the joist, permanently securing the floor while the break occurs below the surface.
For hardwood floors: Fill the tiny remaining hole with matching wood filler for an invisible repair.
Success rate: Users report 80-90% effectiveness for typical subfloor squeaks, making this one of the most reliable DIY solutions available.
Much like how password management provides systematic security solutions, the Squeeeeek No More kit offers a systematic approach to floor noise problems.
Solution #4: Construction Adhesive – The Gap-Filling Game Changer 🏗️
When squeaks are caused by gaps between subfloor and joists, construction adhesive provides a permanent solution that’s favored by professional contractors. This method works particularly well for long gaps or multiple squeaky areas.
Professional Construction Adhesive Technique:
What you’ll need:
- High-quality construction adhesive (like SikaBond or Liquid Nails)
- Caulking gun
- Flashlight
- Helper to walk on floor above
- Respirator mask (adhesive contains strong solvents)
Application process:
Step 1: Access the basement or crawl space beneath squeaky floors. Have someone walk on the floor above while you observe from below to pinpoint exact squeak locations.
Step 2: Look for gaps between the top of floor joists and the underside of the subfloor. Even tiny gaps (1/4 inch or less) can cause significant squeaking.
Step 3: Clean both surfaces thoroughly to ensure proper adhesion.
Step 4: Apply a thick, continuous bead of construction adhesive into the gap using a caulking gun. Work the adhesive as far into the space as possible.
Step 5: For wider gaps, apply adhesive to both sides of the joist for maximum strength.
Step 6: Allow 24 hours for complete curing before walking on repaired areas.
Pro tip: This method also reinforces your floor structure, making it stronger and more stable overall.
Effectiveness: Provides permanent results and can eliminate squeaks across large areas simultaneously.
Solution #5: Wood Shims – The Precision Gap Fillers 📐
Wood shims offer surgical precision for eliminating specific squeak locations caused by gaps between subfloor and joists. This traditional carpentry technique provides excellent long-term results when done correctly.
Professional Shimming Technique:
Materials needed:
- Thin wood shims (available at hardware stores)
- Carpenter’s wood glue
- Small hammer
- Utility knife
- Flashlight
Installation process:
Step 1: Identify the exact squeak location from below while a helper walks above.
Step 2: Locate visible gaps between joists and subfloor. Even tiny gaps can cause major noise issues.
Step 3: Select appropriately sized shims – they should fit snugly without forcing.
Step 4: Apply carpenter’s glue to one flat side of the shim.
Step 5: Gently slide the shim into the gap, glue-side up. Don’t hammer aggressively as this could create a bump in the floor above.
Step 6: Insert shims only 1-2 inches deep – forcing them completely into gaps can worsen squeaks.
Step 7: Allow 24 hours for glue to cure completely before testing.
Step 8: Trim excess shim material flush with joists using a utility knife.
Best practice: Check both sides of each joist – gaps often occur on only one side but can migrate over time.
This methodical approach parallels how systematic IT troubleshooting requires precise identification and targeted solutions.
Solution #6: Strategic Screw Reinforcement – Securing Loose Boards 🔩
When floorboards have pulled away from the subfloor, strategic screw placement can re-establish the connection and eliminate movement-related squeaks. This method works from both above and below the floor.
From Below (Preferred Method):
Step 1: Locate squeaky spots and mark their positions on joists below.
Step 2: Drill pilot holes through the subfloor (but not through the finished floor above).
Step 3: Drive wood screws from the subfloor into the bottom of hardwood flooring. Critical: Use screws that penetrate the subfloor but stop 1/4 inch below the finished floor surface.
Step 4: Have your helper stand on the repaired area while driving screws to ensure tight contact.
From Above (When Basement Access Isn’t Available):
Step 1: Use a stud finder to locate joists beneath squeaky floorboards.
Step 2: Drill angled pilot holes at least 1/2 inch from board edges to prevent splitting.
Step 3: Drive trim screws through hardwood into subfloor at 45-degree angles.
Step 4: Countersink screw heads below the surface and fill holes with matching wood filler.
Step 5: Sand smooth once filler dries completely.
Screw selection: Use appropriate length screws – too long and you’ll penetrate the finished floor surface, too short and you won’t achieve proper holding power.
Solution #7: Structural Reinforcement – The Heavy-Duty Solution 🏠
For widespread squeaking or significant structural gaps, comprehensive reinforcement may be necessary. These methods provide permanent solutions but require more time and skill.
Steel Bridging Installation:
Purpose: Prevents joist movement and floor deflection across large areas.
Process: Install metal bridging in an X-pattern between joists, securing with appropriate fasteners. This cross-bracing significantly reduces movement, particularly in spans longer than 10 feet.
Joist Reinforcement:
When to use: Floor joists that have warped, twisted, or separated from the subfloor.
Method: Secure a 2×4 or 2×6 alongside problematic joists using construction adhesive and screws. Apply adhesive to both the joist-contact side and subfloor-contact side for maximum strength.
Blocking Installation:
Application: Between joists to add overall floor stiffness and prevent movement.
Technique: Cut blocks from the same lumber as existing joists, apply construction adhesive, and secure between joists with screws.
Professional consideration: While these methods are highly effective, they require significant carpentry skills and tools. Consider hiring professionals for extensive structural work.
Just as cloud infrastructure planning requires understanding load distribution and system stability, floor reinforcement demands knowledge of structural principles.
When DIY Isn’t Enough: Calling Professional Help 🏗️
Sometimes squeaky floors indicate more serious problems that require professional assessment and repair. Here’s when to put down the tools and pick up the phone:
Red Flag Situations:
Widespread squeaking: If multiple areas squeak or entire rooms are affected, the problem likely involves major structural issues.
Visible sagging or bouncing: Floors that visibly deflect or feel spongy indicate compromised joists or subfloor damage.
Water damage signs: Staining, warping, or soft spots suggest moisture problems that can lead to structural failure.
Persistent squeaks after multiple repair attempts: If DIY methods haven’t worked, professional diagnosis is needed.
Age-related concerns: Homes over 50 years old may have foundational settling or outdated construction methods requiring expert evaluation.
What Professionals Can Do:
Structural engineers can assess whether squeaks indicate foundation problems or settling issues.
Flooring contractors specialize in comprehensive floor system repairs and can address multiple problems simultaneously.
General contractors handle extensive repairs involving subfloor replacement or joist reinforcement.
Average costs: Professional repairs typically range from $150-$500 for minor fixes, while extensive structural work can cost $1,000-$5,000 depending on the scope.
The same way cybersecurity issues sometimes require professional expertise despite available DIY solutions, complex floor problems benefit from professional assessment.
Prevention: Keeping Your Floors Silent for Life 🛡️
The best squeak fix is preventing squeaks from developing in the first place. Here’s how to maintain squeak-free hardwood floors for decades:
Humidity Control: Your Floor’s Best Friend
Install humidity monitoring systems in multiple rooms to track variations throughout your home. During winter months when heating systems dry the air significantly, use whole-house humidifiers to maintain optimal levels.
Recommended humidity levels:
- Winter: 35-45% relative humidity
- Summer: 45-55% relative humidity
- Year-round target: 40-50% for optimal floor stability
Consider programmable humidity control systems that automatically adjust based on seasonal changes, taking the guesswork out of floor care.
Regular Maintenance Practices:
Annual floor inspections: Check for loose boards, gaps, or signs of movement before they become squeaky problems.
Prompt water damage response: Address spills, leaks, or flooding immediately to prevent wood warping and subfloor damage.
Professional cleaning: Use hardwood-specific cleaning products that don’t introduce excess moisture or damage protective finishes.
Fastener maintenance: Periodically check and tighten loose nails or screws, especially in high-traffic areas.
Smart Installation Practices:
If you’re installing new hardwood floors:
- Allow 3-5 days for wood acclimation to your home’s environment
- Use both mechanical fasteners and construction adhesive
- Ensure proper expansion gaps around room perimeters
- Verify subfloor is level and properly secured to joists
Much like smart home setup requires planning and maintenance, hardwood floor care demands consistent attention to environmental factors.
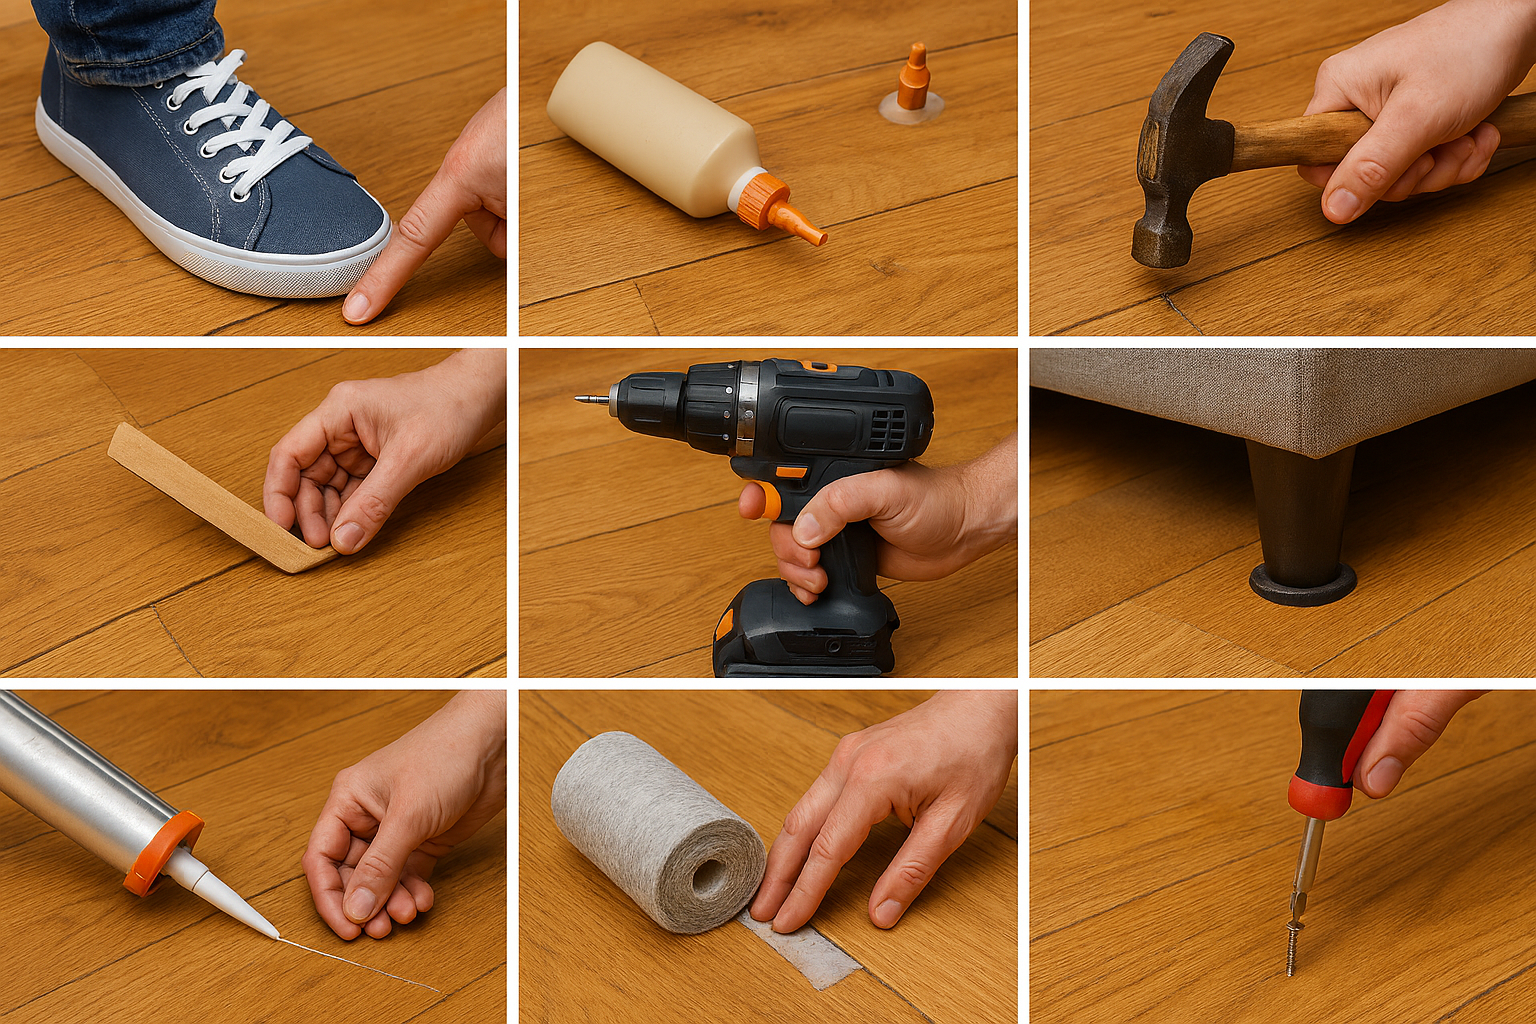
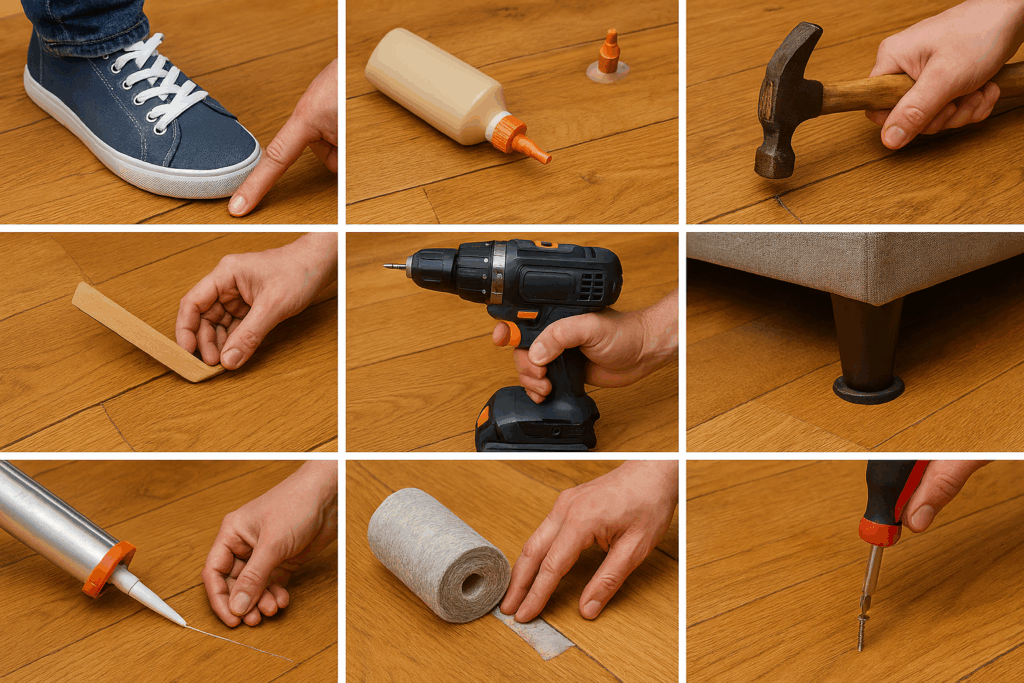
Tool Talk: Essential Equipment for Floor Repairs 🧰
Having the right tools makes squeaky floor repairs much easier and more effective. Here’s what professional contractors recommend keeping on hand:
Basic Tool Kit:
- Stud finder: Essential for locating joists beneath flooring
- Power drill with bits: For pilot holes and screw installation
- Caulking gun: For applying construction adhesive
- Hammer and nail set: For traditional fastener repairs
- Utility knife: For trimming shims and cleanup
- Flashlight or headlamp: Crucial for basement/crawl space work
Specialized Repair Products:
- Squeeeeek No More Kit: $20-25, includes everything needed for most repairs
- Construction adhesive: $8-12 per tube, essential for gap filling
- Wood shims: $5-10 per pack, various thickness options
- Powdered graphite: $5-8, long-lasting lubrication
- Wood filler: $8-15, for filling screw holes and gaps
Professional-Grade Options:
- Squeak-Ender brackets: $15-25 each, for serious structural gaps
- Counter-Snap screws: $12-18 per 50-pack, replacement screws for repair kits
- Steel bridging: $3-8 per piece, for major joist reinforcement
Investment perspective: A complete squeaky floor repair toolkit costs $75-150 but can save thousands in professional repair costs over your home’s lifetime.
Advanced Techniques: When Standard Methods Aren’t Enough 💪
For stubborn squeaks that resist standard treatments, these advanced techniques provide professional-level results:
The Gap Analysis Method
Step 1: Create a detailed map of your basement/crawl space, marking every joist and noting which areas correspond to squeaky floors above.
Step 2: Use a flashlight to systematically inspect every joist-to-subfloor connection, looking for even tiny gaps.
Step 3: Measure gap sizes to determine appropriate repair methods – shims for small gaps, adhesive for medium gaps, structural reinforcement for large gaps.
Step 4: Prioritize repairs based on gap size and squeak severity.
The Multi-Method Approach
Combination repairs often work better than single solutions:
- Use shims for specific gap locations
- Apply construction adhesive for ongoing reinforcement
- Add strategic screws for immediate stabilization
- Install blocking between joists for long-term stability
Advanced Lubrication Techniques
For floating floors and engineered hardwood:
- Stop Creak lubricant: Specifically designed for click-lock systems
- Injection techniques: Using applicator bottles to get lubricant deep into joints
- Seasonal reapplication: Applying lubricants annually in high-traffic areas
Similar to how smart device optimization requires understanding different technologies, advanced floor repair combines multiple techniques for optimal results.
Common Mistakes That Make Squeaks Worse 🚫
Avoid these common errors that can turn minor squeaks into major problems:
Over-Driving Fasteners
The problem: Forcing screws or nails too deep can crack floorboards or create new movement points.
The fix: Use appropriate depth-control tools and pilot holes to prevent over-penetration.
Wrong Fastener Choice
The problem: Using screws that are too long can penetrate through the finished floor surface, creating unsightly holes and potential safety hazards.
The solution: Measure carefully and use screws that penetrate subfloor but stop 1/4 inch below the finished surface.
Excessive Lubrication
The problem: Too much powder or liquid lubricant can create slippery surfaces, attract dirt, or cause staining.
The prevention: Apply lubricants sparingly and clean excess thoroughly.
Ignoring Humidity Issues
The problem: Attempting repairs without addressing underlying humidity problems means squeaks will return as wood continues expanding and contracting.
The solution: Address environmental causes before attempting mechanical repairs.
Force-Fitting Shims
The problem: Hammering shims too aggressively can actually widen gaps or create bumps in the floor above.
The technique: Shims should slide in with gentle pressure, filling gaps without force.
Just like avoiding tech support scams requires knowing red flags, successful floor repair means recognizing potential mistakes before they happen.
Cost Analysis: DIY vs. Professional Repair 💰
Understanding repair costs helps you make informed decisions about which methods to attempt yourself and when to call professionals:
DIY Solution Costs:
Quick fixes (baby powder/graphite): $5-15
- Provides temporary relief for 3-6 months
- Perfect for testing whether lubrication solves the problem
- Requires reapplication but costs minimal
Squeeeeek No More Kit: $20-30
- Permanent solution for most squeaks
- Enough materials for multiple rooms
- Invisible repairs with minimal tools required
Construction adhesive method: $25-50
- Permanent gap filling for extensive areas
- Reinforces floor structure
- Requires basement/crawl space access
Complete DIY toolkit: $75-150
- Handles virtually any squeaky floor situation
- Reusable tools for future problems
- Pays for itself after avoiding one professional call
Professional Repair Costs:
Basic professional repair: $150-300
- Single-area fixes with warranty
- Professional diagnosis included
- Completed quickly with minimal disruption
Comprehensive floor repair: $500-1,500
- Multiple areas or structural reinforcement
- Includes subfloor work if needed
- Long-term warranty on workmanship
Major structural work: $1,500-5,000+
- Joist replacement or reinforcement
- Subfloor replacement
- Foundation-related repairs
When professionals make sense: Complex structural issues, warranty considerations, multiple failed DIY attempts, or lack of basement access.
Seasonal Squeak Strategies: Working with Mother Nature 🌡️
Many squeaks are seasonal and require different approaches depending on when they occur and how long they persist:
Winter Squeak Management
Why winter squeaks happen: Heating systems create dry conditions that cause wood to contract, opening gaps and increasing movement.
Immediate solutions:
- Increase home humidity using humidifiers
- Apply dry lubricants to affected areas
- Monitor squeaks to see if they resolve as humidity increases
Long-term prevention:
- Install whole-house humidification systems
- Use programmable humidity controls
- Consider hardwood-specific heating strategies
Summer Squeak Solutions
Summer squeak causes: High humidity causes wood expansion, which can create pressure points and rubbing between boards.
Management strategies:
- Use dehumidifiers to maintain optimal humidity
- Ensure adequate expansion gaps around room perimeters
- Check for boards that may be binding against walls or fixtures
Year-round stability: The goal is maintaining consistent conditions rather than dramatic seasonal swings.
The systematic approach to seasonal floor care mirrors the attention to environmental factors required for optimal smart home performance.
Troubleshooting Guide: Diagnosing Your Specific Squeak Type 🔍
Not all squeaks are created equal. Different types of floor noise require different repair approaches:
Board-to-Board Squeaks
Characteristics: Noise occurs when stepping on specific floorboards, visible movement between adjacent boards.
Sound profile: Sharp, consistent squeaking that happens in the same spot every time.
Best fixes: Lubrication methods (baby powder, graphite) or strategic screw placement to secure loose boards.
Subfloor Squeaks
Characteristics: Broader area of noise, multiple boards moving together, sounds coming from beneath the surface.
Sound profile: Deeper creaking or groaning sounds that may vary in location.
Best fixes: Construction adhesive, shims, or structural reinforcement methods.
Seasonal Squeaks
Characteristics: Noise appears during specific weather conditions (usually winter), may disappear during humidity changes.
Sound profile: Intermittent squeaking that varies with weather patterns.
Best fixes: Humidity control, temporary lubrication, monitoring for pattern changes.
Structural Squeaks
Characteristics: Widespread noise, floor deflection, squeaks accompanied by bouncing or sagging.
Sound profile: Multiple types of noise including squeaking, creaking, and groaning.
Required action: Professional assessment to determine if foundation or joist issues need attention.
The Science Behind Silent Floors: Understanding Wood Behavior 🧪
Successful squeak repair requires understanding how wood behaves in different conditions and why certain repair methods work better than others:
Wood Movement Principles
Grain direction matters: Wood expands and contracts more across the grain than along it. Understanding this helps predict where problems will develop.
Moisture content relationship: Wood with 6-9% moisture content is most stable. Higher or lower moisture levels increase movement and squeak potential.
Species differences: Softer woods like pine move more than harder species like oak or maple, affecting squeak likelihood and repair success.
Physics of Floor Squeaks
Frequency and resonance: Floor structures act like giant soundboards, amplifying small friction noises into audible squeaks.
Pressure points: Most squeaks occur where concentrated loads (footsteps) create maximum deflection in weak structural areas.
Friction coefficients: Different lubricants provide varying levels of friction reduction – understanding this helps select the most effective treatment.
Modern Engineering Solutions
Today’s floor installation methods incorporate lessons learned from decades of squeak problems:
- Engineered hardwood reduces movement compared to solid wood
- Advanced adhesive systems create stronger subfloor bonds
- Improved fastener technologies resist loosening over time
This technical understanding parallels how computer performance optimization requires understanding system interactions and bottlenecks.
Long-Term Floor Care: Maintaining Your Investment 🏡
Hardwood floors represent a significant investment – proper care ensures they remain beautiful and squeak-free for decades:
Daily Maintenance Habits
Protective measures:
- Use area rugs in high-traffic zones to reduce wear
- Maintain consistent cleaning routines with appropriate products
- Address spills immediately to prevent moisture damage
- Avoid walking on floors with high heels or cleats
Seasonal Care Routines
Spring: Inspect for winter damage, adjust humidity systems, check for loose fasteners.
Summer: Monitor for expansion-related issues, ensure adequate ventilation, maintain humidity control.
Fall: Prepare humidity systems for heating season, inspect for settling-related changes.
Winter: Monitor humidity levels closely, watch for contraction-related squeaks, maintain consistent temperatures.
Professional Maintenance
Annual inspections by flooring professionals can identify potential problems before they become squeaky nightmares.
Refinishing schedules: Properly maintained hardwood floors can be refinished 3-5 times over their lifetime, each time addressing minor structural issues.
Warranty protection: Many flooring warranties require professional maintenance – keep records of care and repairs.
The Bottom Line: Reclaiming Peace and Quiet 🎯
Squeaky hardwood floors don’t have to be a permanent part of your home’s soundtrack. With the right knowledge, tools, and techniques, you can eliminate these annoying noises and restore tranquility to your living space.
Remember the key principles:
- Identify before you fix – understanding the cause determines the best solution
- Start simple – try lubrication methods before moving to structural repairs
- Think long-term – addressing environmental causes prevents future problems
- Know your limits – some repairs require professional expertise
Most squeaks can be fixed for under $50 using the methods outlined in this guide. Even if you need professional help, understanding these techniques helps you communicate effectively with contractors and avoid unnecessary repairs.
The satisfaction of silencing a squeaky floor rivals any DIY accomplishment. No more midnight tiptoeing, no more embarrassing floor noise during dinner parties, and no more wondering if visitors think your house is falling apart.
Your hardwood floors are an investment worth protecting. Whether you choose the quick baby powder fix for temporary relief or invest in comprehensive structural solutions for permanent silence, taking action now prevents minor annoyances from becoming major problems.
Just as taking control of technology enhances daily life, taking control of squeaky floors transforms your home from noisy nuisance to peaceful sanctuary.
The choice is yours: continue playing floor hopscotch for the rest of your life, or spend a weekend implementing these proven solutions and enjoy silent hardwood floors that let you sneak to the kitchen whenever you want! 🍦