
Professional Results Without Experience 🎨
Want to transform your home with a fresh coat of paint but worried you’ll mess it up? You’re not alone! Every year, millions of homeowners attempt DIY painting projects, and while many achieve stunning results, others end up with streaky walls, paint drips, and uneven coverage that screams “amateur hour.” 😅
The good news? With the right painting techniques and tools, you can achieve professional-quality results even if you’ve never held a paint brush before! This comprehensive guide will walk you through everything you need to know to paint like a pro, from selecting the perfect tools to mastering advanced techniques that will have your friends asking if you hired professionals.
Why Most DIY Painting Projects Fail (And How You’ll Succeed) 🎯
Before diving into the techniques, let’s address the elephant in the room: why do so many painting projects go wrong? After researching hundreds of failed DIY attempts, three main culprits emerge:
Poor preparation – Rushing straight to painting without proper prep work Wrong tool selection – Using cheap brushes or incorrect roller types
Technique mistakes – Not understanding how to properly apply paint
Don’t worry though! By the end of this guide, you’ll know exactly how to avoid these pitfalls and create results that rival professional painters.
Essential Tool Selection: Your Foundation for Success 🛠️
The difference between a amateur and professional paint job often comes down to the tools. Professional painters invest in quality equipment because they know it directly impacts the final result. Here’s what you need to know:
Brushes: Your Precision Tools
Synthetic vs Natural Bristles For most modern paints (latex/water-based), synthetic brushes with nylon-polyester blends are your best friend. These brushes maintain their shape and don’t get soggy like natural bristles do with water-based paints. Save natural bristle brushes for oil-based paints and stains.
Size Matters
- 1-2 inch brushes: Perfect for detailed trim work and cutting in around windows
- 2.5-3 inch brushes: Ideal for larger trim pieces and door frames
- 4 inch brushes: Great for painting doors and larger flat surfaces
Angled vs Straight Angled brushes are game-changers for beginners! The slanted bristles make it much easier to create clean lines when cutting in around ceiling edges and trim. Professional painters swear by them for good reason.
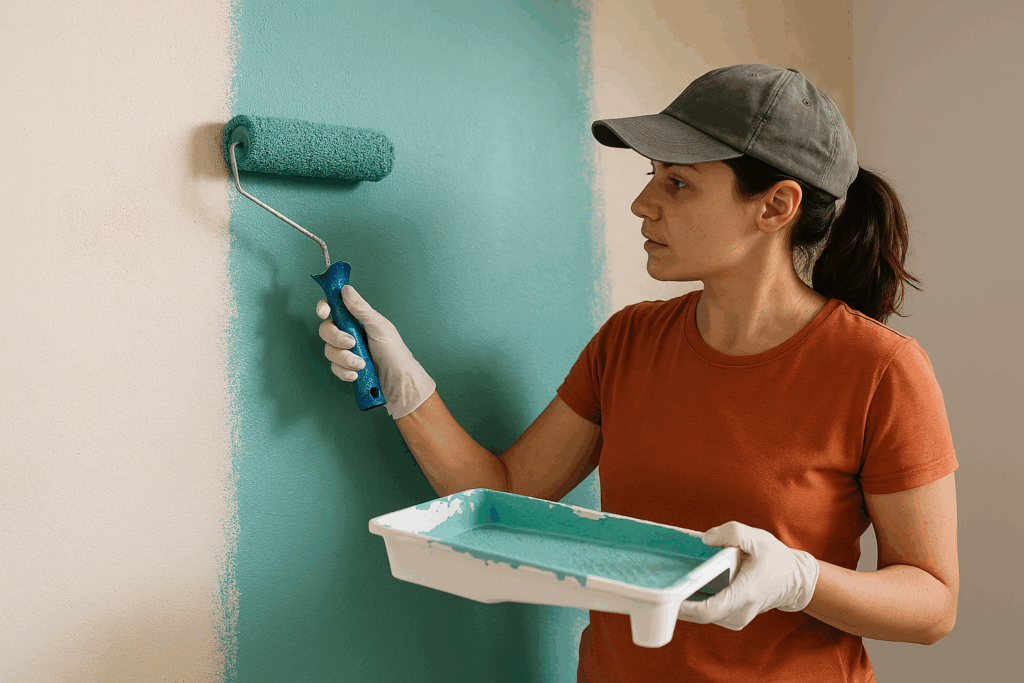
Rollers: Your Coverage Champions
Nap Length is Critical The texture of your wall determines which roller nap you need:
- 1/4 inch nap: Ultra-smooth surfaces like metal doors
- 3/8 inch nap: Most interior walls and smooth drywall
- 1/2 inch nap: Slightly textured walls
- 3/4 inch: Semi-rough surfaces and textured ceilings
Quality Indicators Professional-grade roller covers shed fewer fibers and hold more paint. Look for covers with dense, evenly distributed fibers. Cheap rollers will leave lint on your walls and create an uneven finish.
Additional Must-Have Tools
Paint Trays vs Buckets For small rooms, paint trays work fine. For larger projects, professional painters prefer 5-gallon buckets with roller screens. Buckets hold more paint and reduce the number of refills needed.
Extension Poles A telescoping extension pole transforms your painting experience. It allows you to paint ceilings and high walls without constantly moving a ladder, making the job faster and safer.
The Professional Preparation Process 📋
Here’s where most DIYers go wrong – they skip or rush through preparation. Professional painters spend 70% of their time on prep work because they know it’s the foundation of a perfect paint job.
Step 1: Room Preparation
Furniture and Floor Protection Move furniture to the center of the room and cover with canvas drop cloths. Canvas is superior to plastic because it doesn’t slip underfoot and absorbs paint splatters instead of letting them spread.
Remove Hardware and Outlet Covers Take off switch plates, outlet covers, and cabinet hardware. This extra step takes 10 minutes but saves hours of detailed brushwork later.
Step 2: Surface Preparation
Cleaning is Critical Wipe down all surfaces with a damp cloth and mild cleaner. Paint won’t adhere properly to dirty or greasy surfaces, leading to peeling and poor coverage.
Fill and Sand Use spackling compound to fill nail holes and small cracks. Once dry, lightly sand with 220-grit sandpaper for a smooth finish. This step is non-negotiable for professional results!
Prime When Necessary Don’t skip primer! It’s essential when:
- Painting over dark colors with light paint
- Covering stains or marks
- Painting new drywall
- Switching between paint types (oil to latex)
Master Technique #1: The Perfect Cut-In 🎨
Cutting in – painting clean lines where walls meet ceilings and trim – separates beginners from pros. Here’s the professional approach:
The Loading Technique
Dip only the bottom third of your brush bristles into paint. Tap off excess on the inside of the can – never wipe across the rim, as this removes too much paint.
The Application Method
- Start with a bead: Apply a thin line of paint about 1-2 inches from the edge
- Spread and feather: Use light, smooth strokes to spread the paint toward the edge
- Final pass: Make one smooth, continuous stroke along the edge for a clean line
Pro Tip: The Steady Hand Secret
Rest your non-painting hand against the wall for stability. This simple technique dramatically improves line quality, especially for beginners.
Master Technique #2: Rolling Like a Pro 🎢
Rolling seems simple, but there’s definitely a right and wrong way to do it.
The “W” Pattern Method
Instead of rolling up and down randomly, professionals use the “W” pattern:
- Roll a large “W” shape on the wall (about 3-4 feet wide)
- Fill in the “W” with parallel strokes
- Finish with light, vertical strokes to blend
Maintaining a Wet Edge
This is crucial for avoiding lap marks (those ugly stripes). Always work from wet paint into wet paint. If you take a break and the edge dries, you’ll see lines where the sections meet.
Proper Pressure and Speed
Apply moderate, consistent pressure. Rolling too hard pushes paint out of the roller, while too light pressure leaves an uneven coat. Find the sweet spot and maintain it throughout.
Master Technique #3: Managing Paint Consistency 💧
Paint straight from the can is often too thick for optimal application. Here’s how professionals handle it:
When to Thin Paint
- Wall paint: Usually fine as-is
- Trim paint: Often benefits from slight thinning with appropriate conditioner
- Spraying: Almost always requires thinning
The Conditioner Secret
Paint conditioners (like Floetrol for latex paint) improve flow and brushability without thinning the paint. They’re professional secrets that make paint easier to work with and help eliminate brush marks.
Common Mistakes That Scream “Amateur” (And How to Avoid Them) ⚠️
Mistake #1: Not Using Enough Paint
Trying to stretch paint too far results in thin, streaky coverage. Load your brush or roller properly – it should hold enough paint to cover the intended area without constant reloading.
Mistake #2: Going Back Over Drying Paint
Once paint starts to tack up (become slightly sticky), leave it alone! Going back over partially dried paint creates brush marks and ruins the finish.
Mistake #3: Removing Tape Too Late
Remove painter’s tape while the paint is still slightly wet (but not dripping). If you wait until it’s completely dry, the tape can pull off dried paint, leaving jagged edges.
Mistake #4: Skipping the Second Coat
Even “one-coat” paints usually need two coats for optimal coverage and color depth. Don’t shortcut this step – it’s what gives you that rich, professional look.
Mistake #5: Wrong Paint Sheen Choice
Flat/Matte: Hides imperfections but hard to clean – great for ceilings and low-traffic areas Eggshell: Slight sheen, cleanable – perfect for living rooms and bedrooms
Satin: More durable, good for kitchens and bathrooms Semi-gloss: Very durable and cleanable – ideal for trim and cabinets
Advanced Techniques for Next-Level Results 🚀
Technique #1: The Feathering Method
When blending sections, use light, overlapping strokes that gradually decrease in pressure. This creates seamless transitions between painted areas.
Technique #2: Back-Rolling
After applying paint with a brush in tight areas, immediately go over it with a small roller. This eliminates brush marks and creates uniform texture.
Technique #3: Color Boxing
If using multiple gallons of the same color, mix them together in a larger container. This ensures color consistency throughout the project – slight variations between paint batches can be noticeable on large walls.
Professional Color and Finish Strategies 🌈
Test Before You Commit
Never choose colors based on tiny paint chips! Get sample sizes and paint large swatches (at least 2×2 feet) on your actual walls. Observe them in different lighting conditions throughout the day.
The 60-30-10 Rule
Professional designers follow this classic rule:
- 60%: Dominant color (usually walls)
- 30%: Secondary color (furniture, curtains)
- 10%: Accent color (accessories, artwork)
Lighting Considerations
Paint colors look different under various lighting:
- North-facing rooms: Colors appear cooler and darker
- South-facing rooms: Colors appear warmer and brighter
- LED vs incandescent: Can dramatically change how colors appear
Troubleshooting Common Issues 🔧
Problem: Paint Drips and Runs
Solution: Catch them early! Use a brush to smooth out drips before they dry. If already dry, sand smooth and touch up.
Problem: Uneven Coverage
Solution: Usually indicates insufficient paint on the applicator or trying to cover too large an area. Apply more paint and work in smaller sections.
Problem: Brush Marks Showing
Solution: Use a higher-quality brush, don’t overwork the paint, and consider adding paint conditioner for better flow.
Problem: Color Not Matching
Solution: Ensure you’re using paint from the same batch. If using multiple gallons, box them together before starting.
Time-Saving Professional Shortcuts ⏰
The Plastic Wrap Trick
Wrap brushes and rollers in plastic wrap during breaks instead of washing them. This keeps them fresh for hours and saves cleanup time.
The Extension Pole Advantage
Use extension poles not just for high areas, but for all rolling. It reduces fatigue and gives you better leverage for consistent pressure.
Batch Similar Tasks
Do all cutting in first, then all rolling. This maintains consistency and reduces the number of tool changes needed.
Maintenance and Care for Long-Lasting Results 🛡️
Proper Tool Cleaning
For water-based paints: Wash immediately with warm, soapy water For oil-based paints: Clean with appropriate solvent, then soap and water
Touch-Up Strategy
Save leftover paint in smaller containers for future touch-ups. Label with the room and date. Touch-ups are much easier with the original paint than trying to match later.
When to Repaint
High-quality paint jobs typically last 7-10 years in most homes. Signs it’s time to repaint include:
- Fading or color changes
- Visible wear patterns
- Chipping or peeling
- Stains that won’t clean off
Budget-Friendly Tips Without Compromising Quality 💰
Buy Quality Where It Matters Most
Invest in good brushes and rollers – they’re reusable and directly impact results. You can save money on disposable items like drop cloths and painter’s tape.
Time Your Purchase
Paint goes on sale frequently, especially during spring and fall. Stock up when you find good deals, but make sure you’ll use it within a few years.
Calculate Accurately
Measure twice, buy once! Overestimating leads to waste, while underestimating means mid-project store runs (and potential color matching issues).
Technology Integration for Modern Painters 📱
Just like how cloud computing has revolutionized business operations, technology is transforming home improvement projects. Modern paint apps can help you visualize colors, calculate paint quantities, and even match existing colors using your smartphone camera.
Paint Calculator Apps
Most major paint manufacturers offer apps that calculate exactly how much paint you need based on room measurements. These tools prevent overbuying and ensure you have enough paint to complete the project.
Color Matching Technology
Some apps can analyze a photo and suggest matching paint colors, making it easier to coordinate with existing décor or match a color you love from elsewhere.
Environmental Considerations and Health Safety 🌱
Choose Low-VOC Options
Volatile Organic Compounds (VOCs) can affect indoor air quality. Modern low-VOC and zero-VOC paints perform just as well as traditional formulations while being better for your health and the environment.
Proper Ventilation
Always ensure adequate ventilation when painting. Open windows and use fans to circulate air, especially in smaller spaces.
Safe Disposal
Don’t pour leftover paint down drains! Most communities have paint recycling programs. Dried paint cans can usually go in regular trash.
Planning Your Project Timeline 📅
Realistic Time Expectations
Small room (10×10): 1-2 days including prep Large room (15×20): 2-3 days including prep
Whole house interior: 1-2 weeks for DIYers
Weather Considerations
Humidity: Slows drying time significantly Temperature: Paint performs best between 50-85°F Season: Spring and fall typically offer ideal conditions
Final Professional Tips for Success 🏆
Start Small
If you’re new to painting, start with a small, less visible room like a closet or powder room. This lets you practice techniques without high stakes.
Document Your Work
Take photos and keep notes about paint colors, brands, and techniques used. This information is invaluable for future touch-ups and projects.
Don’t Rush the Process
Professional results take time. Rushing through prep work or trying to apply paint too quickly leads to mistakes that are time-consuming to fix.
Practice Makes Perfect
Like any skill, painting improves with practice. Each project teaches you something new and builds your confidence for more ambitious future projects.
Conclusion: Your Path to Professional Results 🎨
Transforming your space with paint is one of the most rewarding and cost-effective home improvements you can make. With the right tools, techniques, and mindset, there’s no reason you can’t achieve professional-quality results on your first attempt.
Remember, even professional painters started somewhere. The key is understanding that great results come from proper preparation, quality tools, and patient application of proven techniques. Don’t be afraid to take your time – rushing is the enemy of quality.
Whether you’re painting a single accent wall or tackling an entire home makeover, these techniques will serve you well. Start with confidence, knowing you have the knowledge to avoid common pitfalls and create results you’ll be proud to show off.
The satisfaction of stepping back and admiring a perfectly painted room – knowing you did it yourself – is incredible. Plus, you’ll save thousands compared to hiring professionals, and you’ll have gained a valuable skill for future projects!
Ready to pick up that brush? Your walls are waiting for their transformation! 🏡✨
Happy painting, and remember – every professional was once a beginner who refused to give up!